|
| Snapshot taken 25 July 2026 |
|
| Snapshot taken 25 July 2026 |

The Battery had 6 guns - four long 12 pounders and two six pounders. They were disembarked from ships of the First Fleet, transported down the harbour by boat and manually hauled into position using convict labour. Having walked that area, it would have been brutal, block and tackle work over very rough and steep ground.
With French forces ejected from Mauritius in 1810, the threat to the colony passed and the position was abandoned later that year. What happened to the guns is not certain but it appears they were left in position to fall into disrepair.
As part of the expansion of Sydney's Defences following the withdrawal of regular British troops in 1870 (and the added belief that another Russian threat was looming) the fortification was re-established, but relocated slightly north on top of Middle Head, enhancing fields of fire with more modern guns. This was a far more complex fortification including six circular gun positions with associated zig-zag passages and tunnels that led to underground magazines. The Battery was armed with four 80 pounder RML (Palliser conversions) and two 68 pounder SBML guns.

Contemporaneous reports state that these new guns were sited "so poorly that this created the risk of one gun firing upon another". In 1877 earthen berms were placed between gun positions to reduce this danger, while also improving crew protection from incoming fire.
 |
| circa 1870. North head in the background. NSW Library Archives |
 |
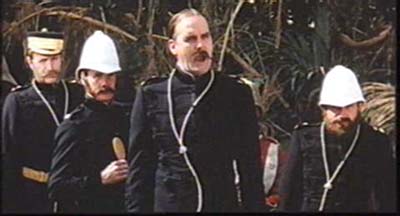
| The Battery in 1885 with NSW Volunteer Artillerymen. South Head behind them, where another Battery was built near the Hornby Lighthouse on the Northernmost (left) point.Today it's an active Naval Base. |
With its commanding views on the entrance, the site was upgraded again in the 1890s to act as the command post coordinating all of Sydney's harbour defences, including the firing of underwater mines mines laid underwater across shipping lanes (1888 – 1922).
 |
| Removal of an old RML in 1891 as part of the upgrades. |
 |
| Middle Head emplacement looking eastwards between North Head (left) and South Head (right), circa 1890-90 |
From the 1890s until the 1930s it was the central command post to coordinate all harbour defences.
 |
| Big gun practice at Middle Head, Circa 1884 to 1917, |
During WW2, the expanded Harbour boom defences were anchored here and QF guns emplaced, but I am going to focus on colonial era only.
Below: 1870s Georges Head battery with guns ready to fire on enemy ships as they entered the harbour. It took 3 months and 250 soldiers to roll the gun barrels all the way from North Sydney along a rough track which became Military Rd (now a very busy main thoroughfare) At the time there were 41 guns emplaced around Sydney Harbour in different fortifications.